Docusign Extension Apps read data from systems of record and use it from Maestro workflows, or send signed PDFs to index, search and archive systems.
In this article I will show you how to create a Docusign Extension App that uses Auth0 for token-based authentication.
The Docusign Extension App documentation does a great job at getting you started quickly, and there is a very nice sample Extension App on GitHub that implements the File Archive contract that you can use as a starting point for adding Auth0 support.
First, some context…
What is an Extension App?
An Extension App is a set of HTTP endpoints that are documented using a manifest.json file. The HTTP endpoints must implement Docusign-defined API contracts, to perform different tasks within a Maestro workflow. For example, the API contract (as TypeScript types) for a File Archive Extension App looks like this:
type SpecifiedFile = {
  name: string;
  content: string;
  contentType: 'bytes' | 'url';
  path: string;
  pathTemplateValues?: string[];
};

export interface ArchiveFileBody {
  files: SpecifiedFile[];
  order?: number;
  overwrite?: boolean;
  parent?: string;
  metadata?: Record<string, unknown>;
}

export interface ArchiveFileResponse {
  message: string;
}
I.e. Docusign will send an HTTP POST body request to an HTTP URL that looks somewhat like this:
{
  "files": [
    {
      "name": "foo.pdf",
      "content": "<BASE64-BYTES>",
      "contentType": "bytes",
      "path": "f5d25f7d-8c9e-41ef-9c9f-d2c4769925cc",
      "pathTemplateValues": [
        "f5d25f7d-8c9e-41ef-9c9f-d2c4769925cc"
      ]
    }
  ]
}
The service listening to the HTTP endpoint can then archive the BASE64 encoded bytes for the signed PDF, or perform other processing, as necessary.
Manifest.json
The metadata for an Extension App is defined in a file called manifest.json — used by the Docusign App Center and runtime services to display metadata for the Extension App and to route requests to the HTTP endpoints.
Authentication
To authenticate requests to Extension Apps Docusign has implemented the OAuth authorization code grant flow which allows Docusign to request (or refresh) an authentication token to be used when making Extension App requests. The sample application generates tokens containing random data and signs the JWT using a secret key. When requests are received the token is retrieved from an HTTP Bearer header and is verified using the same key to check that it is “valid”.
Using Auth0
I would not recommend the sample code for a production application, instead a more sophisticated OAuth provider is required. In this article we will use Auth0, however the general approach should be applicable to other commercial, or Open Source, OAuth providers that support authorization code grant flow.
Auth0 Configuration
First you need to create an Auth0 account, or login. Once logged in you can choose to create a Tenant, or use your default Tenant. Tenants are useful if you have multiple applications using Auth0 and don’t want to mix configurations across applications.
Auth0 API
You then need to create a new Auth0 API. APIs are purely Auth0 metadata: they allow you to define an identifier for an API (the so-called “audience” OAuth value) and to control the metadata on the tokens that are issued for the API (such as expiration time). For advanced scenarios you can also model Role-Based-Access-Control, which adds Role and Permission information to issued tokens. We won’t be using RBAC for this article.
For this article I have created an API with the audience value (identifier) https://concertograph.com/api/archive. Note that this value can be anything you like, it does not have to be a valid web URL.

Once you’ve defined your API in Auth0 you MUST ensure that the “allow offline access” setting is ON:

This setting allows Docusign to request new tokens for your API when the old tokens have expired. You can leave all the other settings in their default state.
Auth0 Application
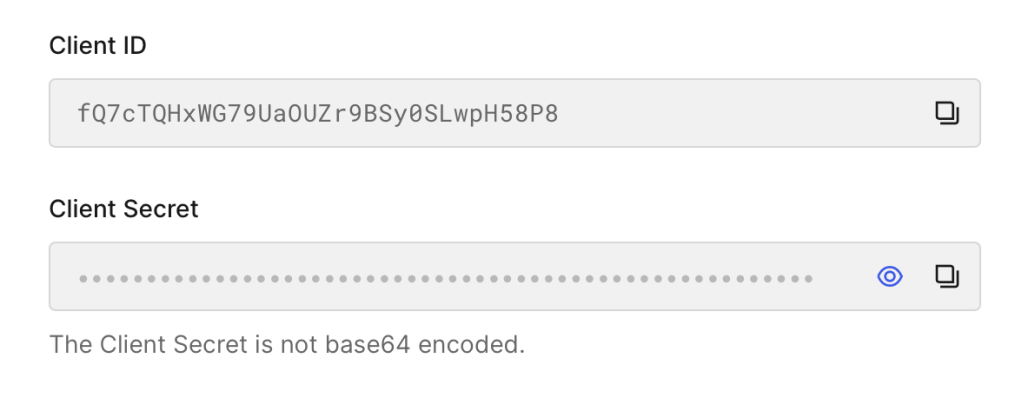
You then need to define an Auth0 Application and associate it with the Auth0 API you defined above. The Auth0 application will have a Client ID and Client Secret associated, which we will need to provide to Docusign via manifest.json (see below).
The application type is “Machine to Machine” because Docusign (a machine) will be triggering the authentication flow.

To use the Docusign testing/validation interface within the Docusign Developer Center you need to enable two allowed callback URLs. These are the web-endpoints that can receive authentication codes from Auth0. E.g. for demo:
https://demo.services.docusign.net/act-gateway/v1.0/oauth/callback-test, https://demo.services.docusign.net/act-gateway/v1.0/oauth/callback

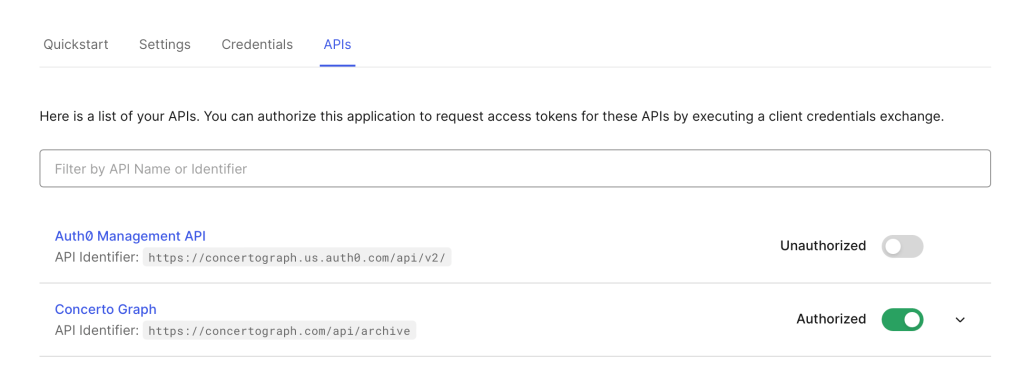
Make sure that your API is authorised to use this application:
You will also need the OAuth Authorization URL and Token URL. These are hidden under App > Advanced Settings > Endpoints. E.g.

Manifest.json for Auth0
With the Auth0 configuration done and the data gathered you can now update the sample manifest.json to inform Docusign how to retrieve authentication tokens for your API. The important changes are highlighted in bold.
{
  "name": "File Archive App",
  "description": {
    "short": "App for file archive",
    "long": "This app is designed to allow for users to archive a signed DocuSign agreement"
  },
   "icon": {
    "data": "PHN2ZyB3aWR0aD0iNDAzIiBoZWlnaHQ9IjQwMyIgdmlld0JveD0iMCAwIDQwMyA0MDMiIGZpbGw9Im5vbmUiIHhtbG5zPSJodHRwOi8vd3d3LnczLm9yZy8yMDAwL3N2ZyI+CjxwYXRoIGQ9Ik00MDIuMjYxIDAuNTY4ODQ4SDAuMjYwNzQyVjQwMi41NjlINDAyLjI2MVYwLjU2ODg0OFoiIGZpbGw9IiNENUZGMDAiLz4KPHBhdGggZD0iTTM0Ni4zOTEgMzA3LjY4OUg1Ni4wNjY5VjM0Ni43NTdIMzQ2LjM5MVYzMDcuNjg5WiIgZmlsbD0iYmxhY2siLz4KPHBhdGggZD0iTTIwMS4yODIgMjg1LjMxMUwyMjguOTI1IDI1Ny43MjJMMzEyLjk1OCAxNzMuNjM2TDI4NC45OTkgMTQ1LjczTDIyMC44MTYgMjA5Ljk2NlY1MC43OTgySDE4MS42OTZMMTgxLjc0OCAyMDkuOTY2TDExNy41MTMgMTQ1LjczTDg5LjYwNjkgMTczLjYzNkwxNzMuNjQgMjU3LjcyMkwyMDEuMjgyIDI4NS4zMTFaIiBmaWxsPSJibGFjayIvPgo8L3N2Zz4K",
    "mediaType": "image/png"
  },
  "screenshots": [],
  "publisher": {
    "name": "John Doe",
    "email": "john.doe@gmail.com",
    "phone": "800-867-5309",
    "website": "www.johndoe.com"
  },
  "termsOfServiceUrl": "www.johndoe.com/tos",
  "privacyUrl": "www.johndoe.com/privacy",
  "supportUrl": "www.johndoe.com/support",
  "connections": [
    {
      "name": "authentication",
      "description": "secure connection to the file archive proxy",
      "type": "oauth2",
      "params": {
        "provider": "CUSTOM",
        "scopes": [],
        "clientId": "AUTH0-APP-CLIENT-ID",
        "clientSecret": "<AUTH0-APP-CLIENT-SECRET>",
        "customConfig": {
          "tokenUrl": "https://concertograph.us.auth0.com/oauth/token",
          "authorizationUrl": "https://concertograph.us.auth0.com/authorize",
          "authorizationParams": {
            "audience" : "https://concertograph.com/api/archive"
          },
          "authorizationMethod": "header",
          "scopeSeparator": " ",
          "requiredScopes": ["offline_access"]
        }
      }
    }
  ],
  "extensions": [
    {
      "name": "My Archive Extension",
      "description": "using to archive an envelope",
      "template": "EAP.Version1.SpecifiedArchive",
      "actionReferences": ["My Archive Action"]
    }
  ],
  "actions": [
    {
      "name": "My Archive Action",
      "description": "something about archiving to a proxy",
      "template": "Document.Version1.SpecifiedArchive",
      "connectionsReference": "authentication",
      "params": {
        "uri": "<PROXY_BASE_URL>/api/archive"
      }
    }
  ]
}
Testing
With those changes in place, and your manifest.json uploaded to the Docusign Developer Console, you can now test that authentication works.
Press the Run Test button for your Extension App.

Confirm that the correct authorization URL is being read from manifest.json.

When you press the Run Test button a new window will be displayed, prompting you to login to your application using Auth0. Note, if you are using a pop-up blocker you may need to manually open the window, or disable it.

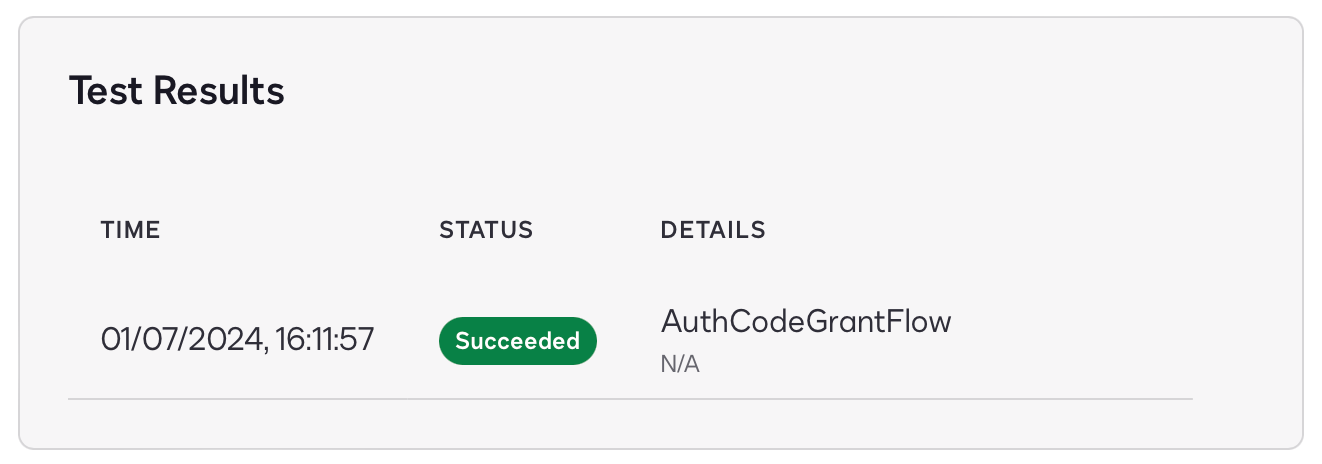
Assuming you login to your application successfully, you will see that the authorization test passed, i.e. Docusign was able to retrieve an access token from Auth0, using the metadata you supplied in manifest.json.

You can confirm this by checking the Auth0 logs, also useful for debugging issues:

Verifying Tokens
The last update you need to make is to the service endpoint itself, it needs to verify that the token is valid and has come from Auth0. You can do that by updating the achiveRouter route to look like this:
import { Router } from 'express';

import Paths from '../constants/paths';
import { archiveFile } from '../services/archive.service';
import { checkSchema } from 'express-validator';
import { archiveFileBody } from '../validationSchemas/archive';
import checkValidationErrors from '../middleware/checkValidationErrors';
const { auth } = require('express-oauth2-jwt-bearer');

const archiveRouter = Router();

const jwtCheck = auth({
  audience: 'https://concertograph.com/api/archive',
  issuerBaseURL: 'https://concertograph.us.auth0.com/',
  tokenSigningAlg: 'RS256'
});

// enforce on all endpoints
archiveRouter.use(jwtCheck);

archiveRouter.post(
  Paths.Archive.File.Post,
  checkSchema(archiveFileBody, ['body']),
  checkValidationErrors,
  archiveFile,
);

export default archiveRouter;
Note the use of RS256 encryption for the JWT (the Auth0 default), which is more secure than HS256 (which requires a shared secret between Auth0 and your application). Using RS256 token encryption a public (verification) key is shared with the application, and the private (encryption) key is managed by Auth0, and can be rotated if compromised (without application downtime).
Summary
I hope that was a useful deep-dive into how to secure your Docusign Extension Apps using a 3rd-party OAuth provider, and Auth0 specifically. Authentication is a complex topic, a dance between your application endpoint, Docusign, and Auth0 as the OAuth provider.

August 19, 2024 at 8:18 pm
It’s missing one step:
You need to enable the “Authorization Code” option under you app Advanced Settings -> Grant Types tab
LikeLike